Complete website build including:
- Build Your Kit store page with cart system, sectioned layout
  (Hardware, Software, Attachments, Spare Parts), inline quote
  request form, and sticky sidebar summary
- 16+ pages: Education, Platform, Resources, News, About Us,
  Download, Contact, Rover, Code Editor, Robot Simulator, etc.
- 89+ MDX resource articles and 18 news posts
- Store product images scraped from micromelon.com.au
- Quote request API route with Airtable integration
- Dynamic back links and cover photos on resource pages
- Redesigned downloads page
- Fixed corrupted MDX code blocks
111 lines
4.4 KiB
Plaintext
111 lines
4.4 KiB
Plaintext
---
|
||
title: "Build Guide: RoboRAVE Line Follow"
|
||
date: "2024-12-31"
|
||
categories: ["Build Guides"]
|
||
tags: ["Build Guide", "3D Printing", "Line Follow"]
|
||
excerpt: "What You’ll Need: Click on the buttons below to collect the print files! Printables Thingiverse Makerworld"
|
||
featuredImage: "/images/resources/build-guide-roborave-line-follow.jpg"
|
||
---
|
||
|
||

|
||
|
||
## What You’ll Need:
|
||
|
||
|
||
|
||
Click on the buttons below to collect the print files!
|
||
|
||
[
|
||
Printables
|
||
](https://www.printables.com/model/639386-micromelon-roborave-line-follow-attachment)
|
||
|
||
[
|
||
Thingiverse
|
||
](https://www.thingiverse.com/thing:6284165)
|
||
|
||
[
|
||
Makerworld
|
||
](https://makerworld.com/en/models/147778)
|
||
|
||

|
||
|
||
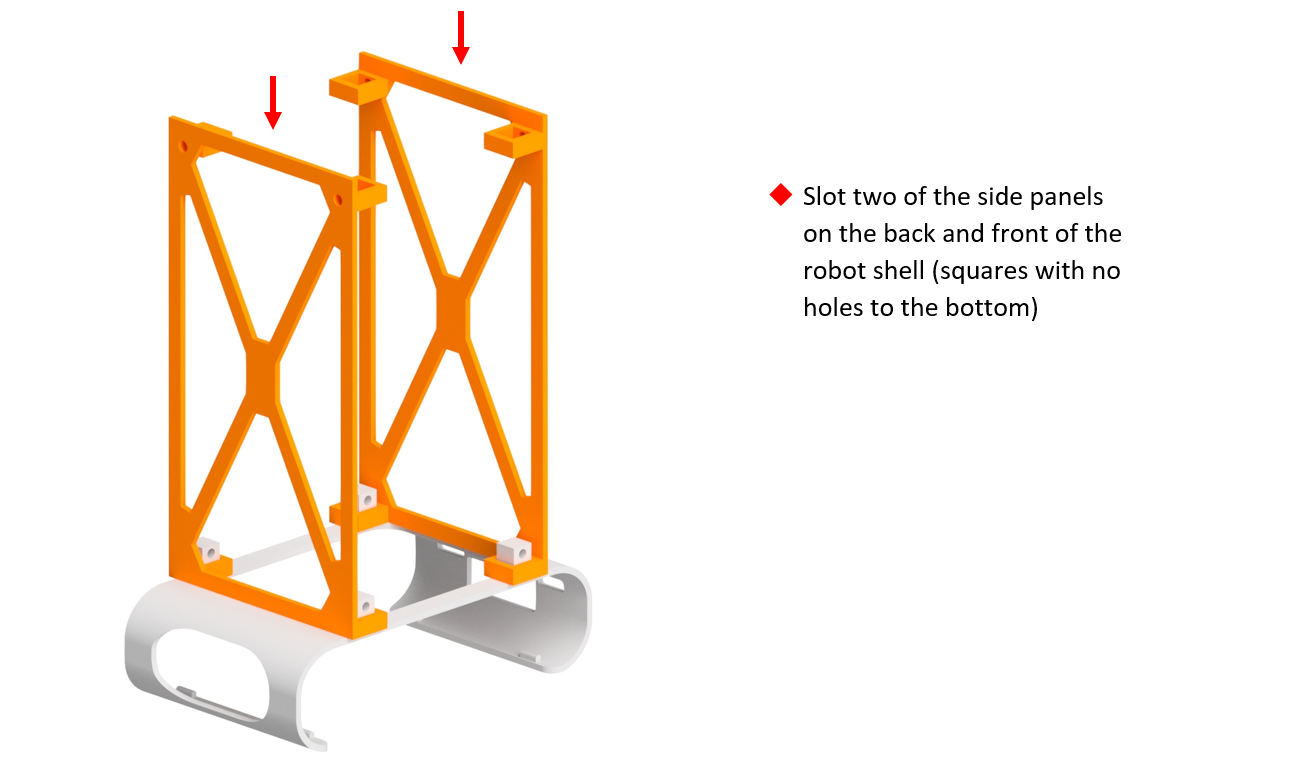
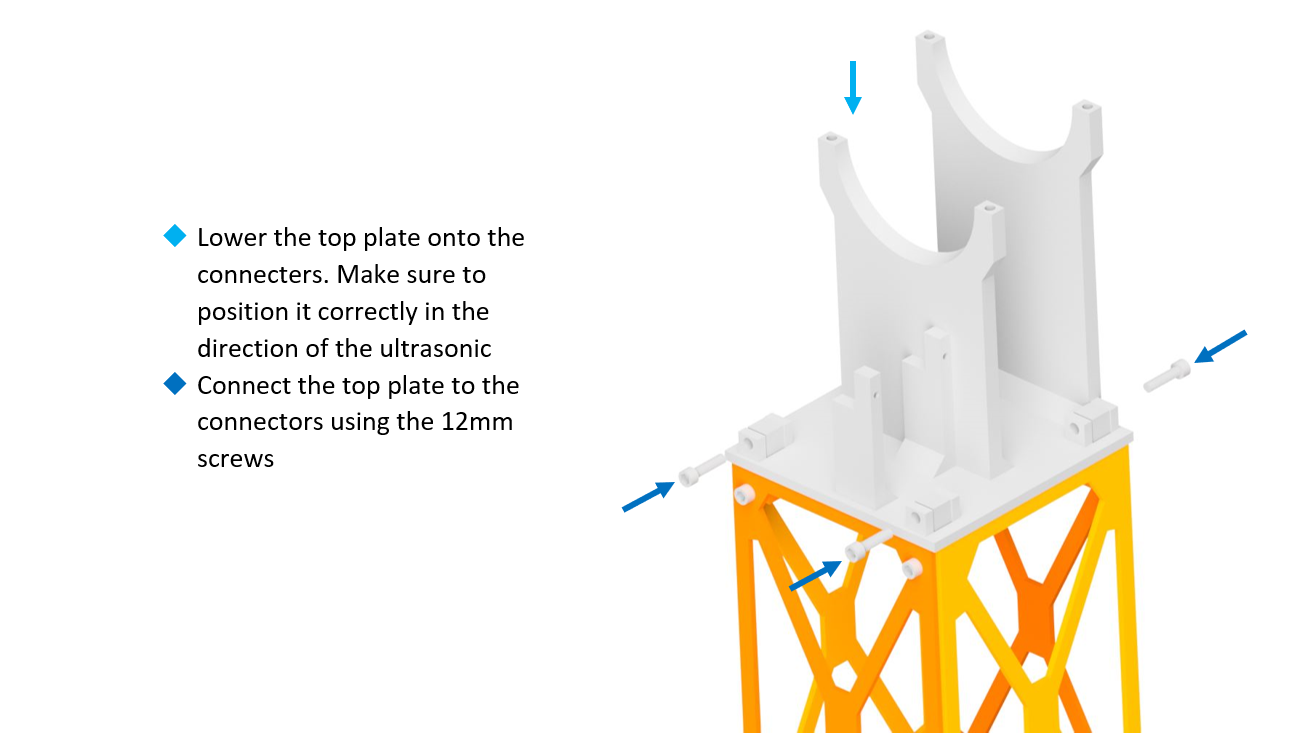
## Step 1:
|
||
|
||
|
||
|
||

|
||
|
||
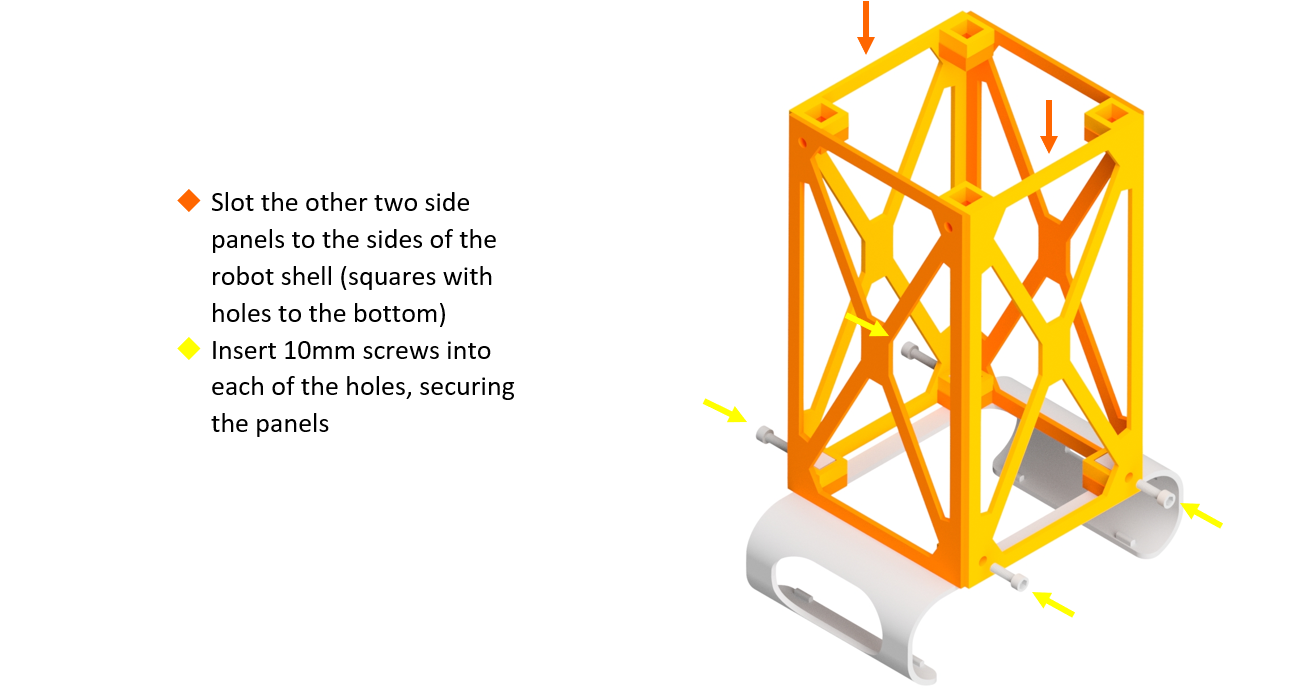
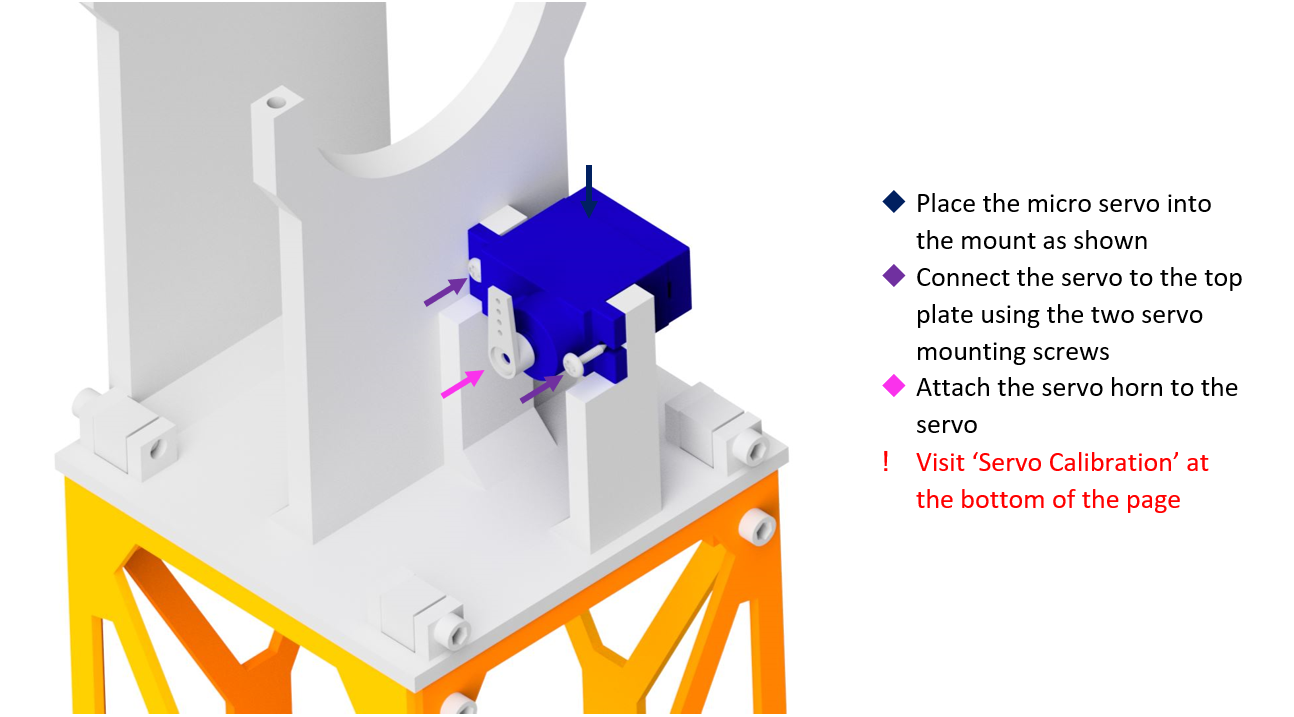
## Step 2:
|
||
|
||
|
||
|
||

|
||
|
||
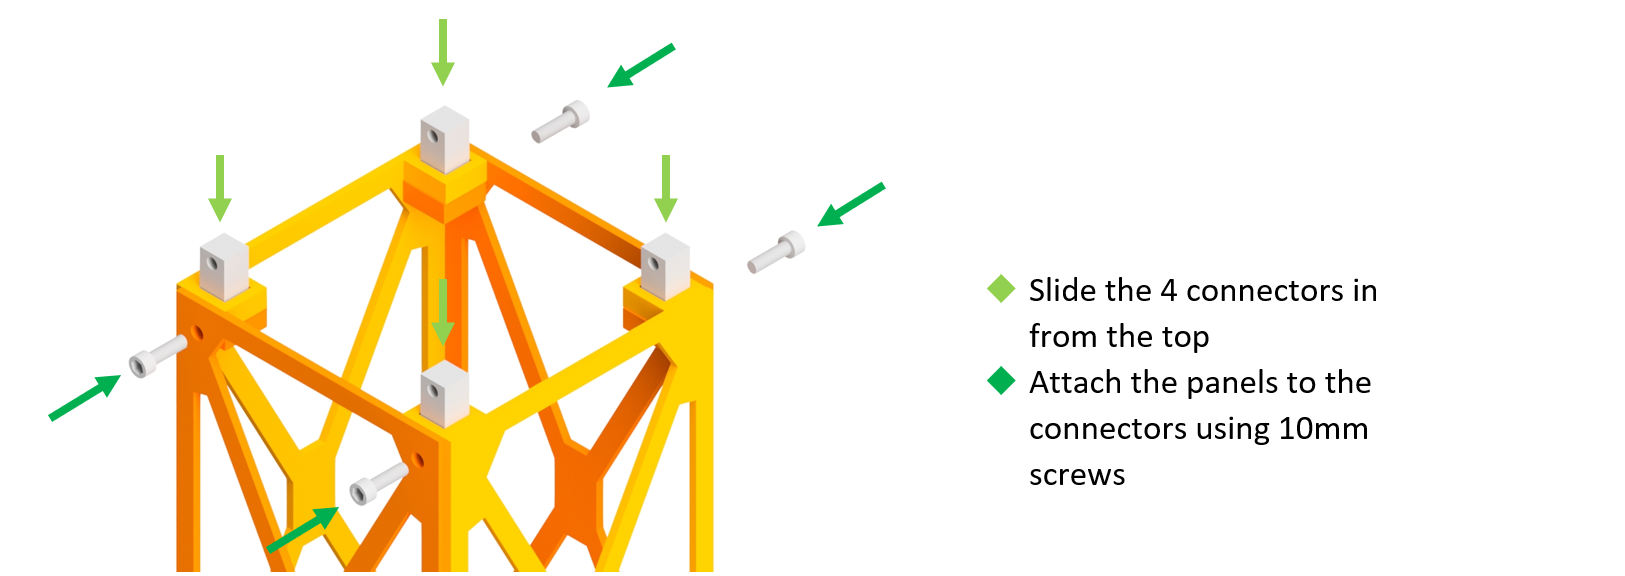
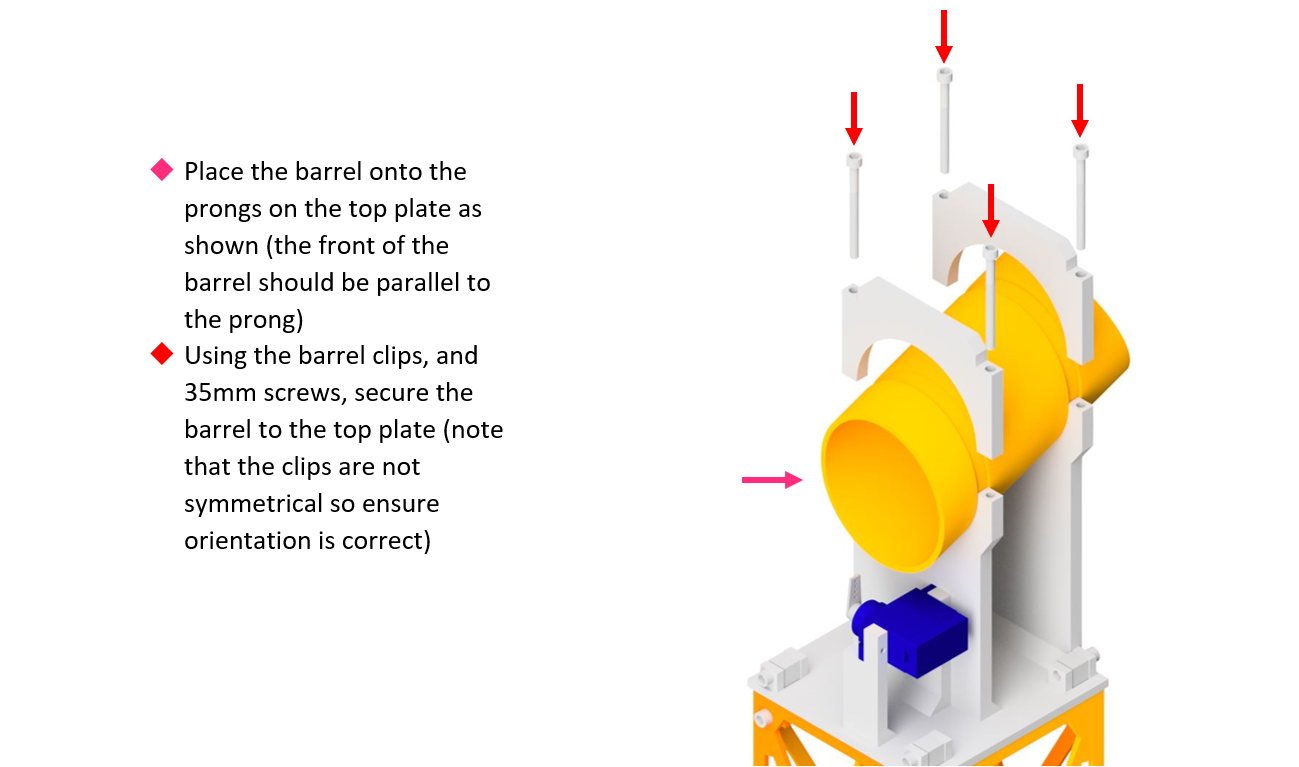
## Step 3:
|
||
|
||
|
||
|
||

|
||
|
||
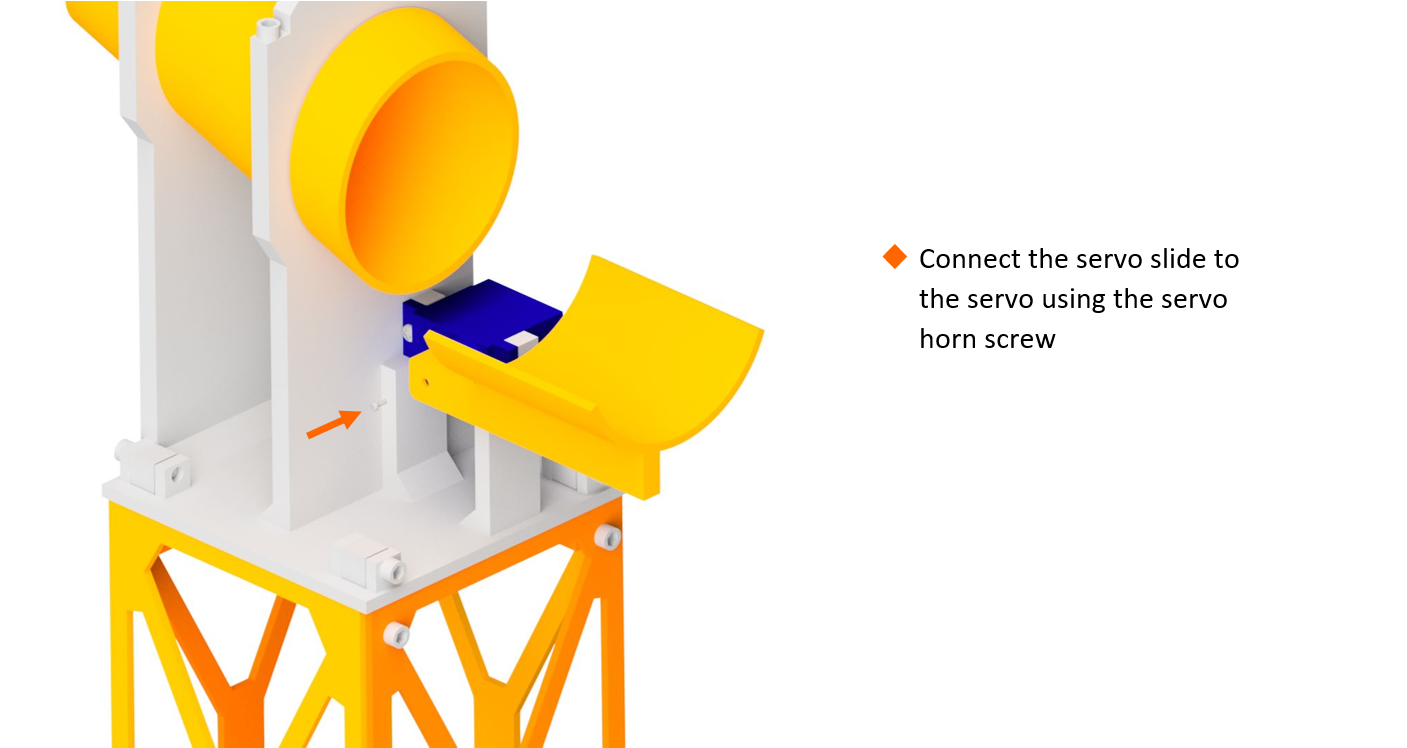
## Step 4:
|
||
|
||
|
||
|
||

|
||
|
||
## Step 5:
|
||
|
||
|
||
|
||

|
||
|
||
## Step 6:
|
||
|
||
|
||
|
||

|
||
|
||
## Step 7:
|
||
|
||
|
||
|
||

|
||
|
||
## Step 8:
|
||
|
||

|
||
|
||

|
||
|
||
## Complete:
|
||
|
||

|
||
|
||

|
||
|
||
## Servo Calibration:
|
||
|
||
Before attaching a servo horn to a servo, we need to make sure that the servo moves in the correct range. This guide will help you calibrate your servos correctly.
|
||
|
||
---
|
||
|
||
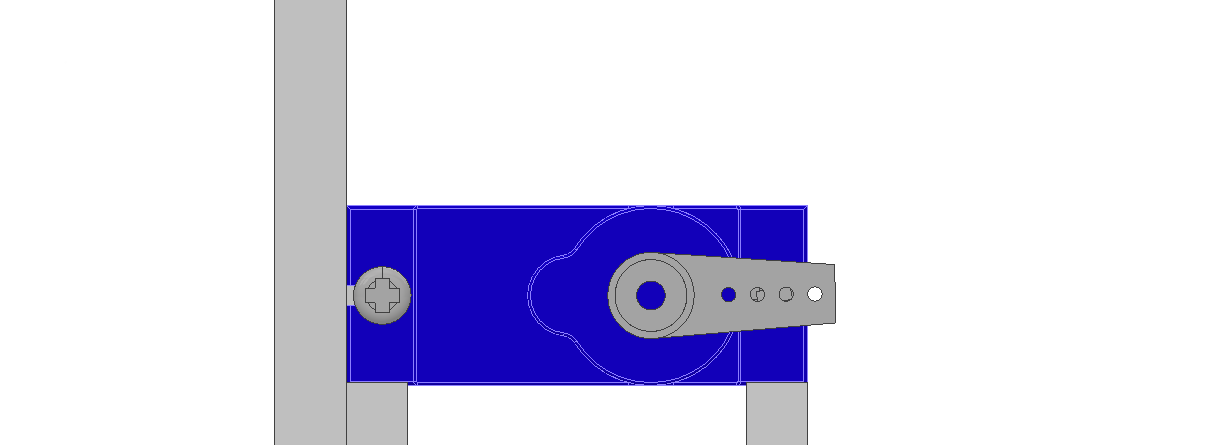
#### Step 5:
|
||
|
||

|
||
|
||
Once step 5 is completed, plug the servo into the right port and run the following code
|
||
|
||
|
||
|
||
Upload the code and attach the servo horn to the servo so it’s in this position when the servo is at 0.
|
||
|
||

|
||
|
||
## What’s Next?
|
||
|
||
With your fully built Micromelon RoboRAVE attachment, head on over to our guide to RoboRAVE line follow to get started!
|
||
|
||
[
|
||
Guide to RoboRAVE Line Follow
|
||
](https://micromelon.com.au/resources/guide-to-roborave-line-follow)
|